
One of the awesome projects at Maker Faire 2016 was creating a drone. Radio Shack had a free workshop using their DIY Drone Kits. Naturally I got a kit and quickly assembled it. However, my drone piloting skills are still developing and this quad has had more than a few rough landings. It wasn’t long before the original airframe needed to be replaced. A couple weeks of work later, I was successful and the replacement airframe can be found on Thingiverse! Follow me after the break and I’ll share all the details on my latest project!
Creating a drone airframe required quite a bit of engineering. The first step was to measure the key parts: motors, PCB, battery. The PCB is not a regular shape and needs to be held snug in place. Furthermore, the LEDs, charging port, battery connection, and on/off switch stick out in 3 dimensions.
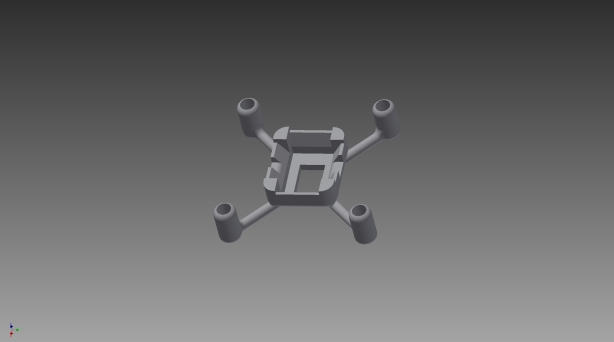
After I got my measurements, I began to create a model in Autodesk Inventor. I knew the airframe needed to be light, but strong. Since I was going to 3D print the airframe, I tried to reduce weight wherever I could while still making the part robust enough to print successfully. The final model is below. Now it is time to get my Makerbot Replicator 2X printing!
In order to aid in printing, I used HIPS or High-Impact Polystyrene as a support. This additional step was helpful due to the angles required for the model. To clean the HIPS off the final airframe, I soaked the model overnight in D-Limonene. This solvent will dissolve the HIPS, but not affect the ABS. Like most ABS prints, this model did encounter some shrinkage and required a few iterations.
Rarely do I get things right the first time. With that in mind I had several “works in progress”. I am far from an expert in CAD. Things take me a little longer to figure out how to draw what I need. As a result I printed out 5 total prototype before getting to the one I wanted. The prototypes are in the image below.

The right-most model was my first try, just trying to get the diameter of the motors correct. While that printed, I began to work on the supports for the battery and PCB as seen in the left-most model. With the drone quickly taking shape, I decided to trim some weight and improve the fit of the PCB. This process was not successful as seen in the second model from the left. During printing, the walls were too thin and didn’t form correctly. Learning form that mistake, I made the walls slightly thicker in the second model from the right. Finally I decided to add some cutouts for the charging port and power switch. The final model is in the center.
Once I had everything fit, I took the new airframe for a test drive. Much to my surprise, the new airframe is quite a bit lighter, resulting in quicker ascents and noticeably longer battery life. With the final model tested (and a few spares printed), I have uploaded the drone to Thingiverse to share. You can get all the details here.
Stay tuned for more projects with this drone kit! It is a great way to get into quadcopters and a fun platform for hacking!
